Showing posts with label Java. Show all posts

Fatal error compiling: tools.jar not found

Issue:

[INFO] Scanning for projects...
[INFO]                                                                        
[INFO] ------------------------------------------------------------------------
[INFO] Building CommandsGUI 1.1-SNAPSHOT
[INFO] ------------------------------------------------------------------------
[INFO]
[INFO] --- maven-enforcer-plugin:1.0:enforce (enforce-maven) @ CommandsGUI ---
[INFO]
[INFO] --- maven-resources-plugin:2.6:resources (default-resources) @ CommandsGUI ---
[INFO] Using 'UTF-8' encoding to copy filtered resources.
[INFO] Copying 2 resources
[INFO]
[INFO] --- maven-compiler-plugin:2.5.1:compile (default-compile) @ CommandsGUI ---
[INFO] Compiling 11 source files to C:\workspace\CommandsGUI\target\classes
[INFO] ------------------------------------------------------------------------
[INFO] BUILD FAILURE
[INFO] ------------------------------------------------------------------------
[INFO] Total time: 5.687 s
[INFO] Finished at: 2016-08-04T17:35:31+01:00
[INFO] Final Memory: 8M/20M
[INFO] ------------------------------------------------------------------------
[ERROR] Failed to execute goal org.apache.maven.plugins:maven-compiler-plugin:2.5.1:compile (default-compile) on project CommandsGUI: Fatal error compiling: tools.jar not found: C:\Java\jdk1.8.0_74\jre\..\lib\tools.jar -> [Help 1]
[ERROR] 
[ERROR] To see the full stack trace of the errors, re-run Maven with the -e switch.
[ERROR] Re-run Maven using the -X switch to enable full debug logging.
[ERROR] 
[ERROR] For more information about the errors and possible solutions, please read the following articles:
[ERROR] [Help 1] http://cwiki.apache.org/confluence/display/MAVEN/MojoExecutionException


Solution:

Right Click on the project > Build Path > Configure Build Path
Select java build path >  Remove the old JRE e.g JRE 1.6
Add library
Select System JRE Library
Next
Click alternative JRE
Select the latest on and then Finish


How to Install Jenkins Pipeline and simple example (Dev-Build, Dev-Deploy & Test-Deploy jobs) in Windows

Following tools used:

  1. JDK 1.8.0_101
  2. Maven 3.3.3
  3. Windows 10
Verify
    1. JDK and JAVA_HOME. Make sure JDK is installed, and “JAVA_HOME” variable is added as Windows environment variable.
    2. Apache Maven. Visit Maven official website, download the Maven zip file, for example: apache-maven-3.3.3-bin.zip . ...
    3. Add M2_HOME and MAVEN_HOME. ...
    4. Add To PATH. ...
    5. Verification. Java, javac and mvn-version

Installing Jenkins in Windows

Rest of info watch from Video.


References:
Jenkins
Oracle
Tomcat
Apache


How to install Maven on Windows

How to Install Apache Maven 3.3.9 in Windows:

  1. JDK and JAVA_HOME. Make sure JDK is installed, and “JAVA_HOME” variable is added as Windows environment variable.
  2. Download Apache Maven. Visit Maven official website, download the Maven zip file, for example : apache-maven-3.3.3-bin.zip . ...
  3. Add M2_HOME and MAVEN_HOME. ...
  4. Add To PATH. ...
  5. Verification. mvn-version
Tools Used :
  1. JDK 1.8.0_101
  2. Maven 3.3.3
  3. Windows 10
      More in Video


java.io.IOException: Cannot run program in Shell Scrip (Java Runtime.getRuntime().exec())


IOException while executing the unix shell command by java, Runtime.getRuntime().exec(), java.io.IOException, Cannot run program, No such file or directory.

JSP file where issue occurred:

<%@ page language="java" contentType="text/html; charset=ISO-8859-1"
    pageEncoding="ISO-8859-1"%>
<%@ page import="java.io.BufferedReader,java.io.IOException,java.*,java.lang.Runtime,java.io.InputStreamReader;" %>
<!DOCTYPE html PUBLIC "-//W3C//DTD HTML 4.01 Transitional//EN" "http://www.w3.org/TR/html4/loose.dtd">
<html>
<head>
<meta http-equiv="Content-Type" content="text/html; charset=ISO-8859-1">
<title>Insert title here</title>
</head>
<body>

<%
StringBuffer objOutPut = new StringBuffer();
Process objProcess;
try {
String[] command = {"ls -tlr"};

     objProcess = Runtime.getRuntime().exec(command);
   
BufferedReader reader = new BufferedReader(new InputStreamReader(
objProcess.getInputStream()));

String line = "";
while ((line = reader.readLine()) != null) {
System.out.println((line + "\n"));
objOutPut.append(line + "\n");
}
} catch (Exception e) {
e.printStackTrace();
}

%>

<textarea rows="20" cols="150">
<%=objOutPut %> 
</textarea>
</body>
</html>

Issue:

java.io.IOException: Cannot run program "ls -tlr": java.io.IOException: error=2, No such file or directory
        at java.lang.ProcessBuilder.start(ProcessBuilder.java:494)
        at java.lang.Runtime.exec(Runtime.java:612)
        at java.lang.Runtime.exec(Runtime.java:485)
        at org.apache.jsp.jsp.cmd_005foutput_jsp._jspService(cmd_005foutput_jsp.java:75)
        at org.apache.jasper.runtime.HttpJspBase.service(HttpJspBase.java:70)
        at javax.servlet.http.HttpServlet.service(HttpServlet.java:723)
        at org.apache.jasper.servlet.JspServletWrapper.service(JspServletWrapper.java:388)
        at org.apache.jasper.servlet.JspServlet.serviceJspFile(JspServlet.java:313)
        at org.apache.jasper.servlet.JspServlet.service(JspServlet.java:260)
        at javax.servlet.http.HttpServlet.service(HttpServlet.java:723)
        at org.apache.catalina.core.ApplicationFilterChain.internalDoFilter(ApplicationFilterChain.java:290)
        at org.apache.catalina.core.ApplicationFilterChain.doFilter(ApplicationFilterChain.java:206)
        at org.apache.catalina.core.StandardWrapperValve.invoke(StandardWrapperValve.java:233)
        at org.apache.catalina.core.StandardContextValve.invoke(StandardContextValve.java:191)
        at org.apache.catalina.authenticator.AuthenticatorBase.invoke(AuthenticatorBase.java:470)
        at org.apache.catalina.core.StandardHostValve.invoke(StandardHostValve.java:127)
        at org.apache.catalina.valves.ErrorReportValve.invoke(ErrorReportValve.java:103)
        at org.apache.catalina.core.StandardEngineValve.invoke(StandardEngineValve.java:109)
        at org.apache.catalina.connector.CoyoteAdapter.service(CoyoteAdapter.java:293)
        at org.apache.coyote.http11.Http11Processor.process(Http11Processor.java:861)
        at org.apache.coyote.http11.Http11Protocol$Http11ConnectionHandler.process(Http11Protocol.java:620)
        at org.apache.tomcat.util.net.JIoEndpoint$Worker.run(JIoEndpoint.java:489)
        at java.lang.Thread.run(Thread.java:701)
Caused by: java.io.IOException: java.io.IOException: error=2, No such file or directory

Solutions:

Put the command in .sh file and call that file with actual path.
e.g 

<%@ page language="java" contentType="text/html; charset=ISO-8859-1"
    pageEncoding="ISO-8859-1"%>
<%@ page import="java.io.BufferedReader,java.io.IOException,java.*,java.lang.Runtime,java.io.InputStreamReader;" %>
<!DOCTYPE html PUBLIC "-//W3C//DTD HTML 4.01 Transitional//EN" "http://www.w3.org/TR/html4/loose.dtd">
<html>
<head>
<meta http-equiv="Content-Type" content="text/html; charset=ISO-8859-1">
<title>Insert title here</title>
</head>
<body>

<%
StringBuffer objOutPut = new StringBuffer();
Process objProcess;
try {
String[] command = {"/home/catlog.sh"};
//String[] command = {"ls -tlr"};

     objProcess = Runtime.getRuntime().exec(command);
   
BufferedReader reader = new BufferedReader(new InputStreamReader(
objProcess.getInputStream()));

String line = "";
while ((line = reader.readLine()) != null) {
System.out.println((line + "\n"));
objOutPut.append(line + "\n");
}
} catch (Exception e) {
e.printStackTrace();
}

%>

<textarea rows="20" cols="150">
<%=objOutPut %> 
</textarea>
</body>
</html>


Done for the day!!!

How to install multiple instance of Tomcat 8 in CentOS?

For installing the Tomcat 8 we need JDK1.7, for more details must see bellow email:


1. Verifying, Installing and Configuring Java

java -version

[root@vagrant-centos65 tomcats]# java -version
java version "1.7.0_95"

To install on CentOS/RHEL 7 Distribution:

[root@vagrant-centos65 tomcats]# yum install java-1.7.0-openjdk

2. Downloading Tomcat 8

http://mirror.ox.ac.uk/sites/rsync.apache.org/tomcat/tomcat-8/v8.0.32/bin/apache-tomcat-8.0.32.tar.gz

[root@vagrant-centos65 tomcats]#wget http://mirror.ox.ac.uk/sites/rsync.apache.org/tomcat/tomcat-8/v8.0.32/bin/apache-tomcat-8.0.32.tar.gz

[root@vagrant-centos65 tomcats]#tar -zxvf apache-tomcat-8.0.32.tar.gz

3. Running Tomcat 8

cd ~/bin
./startup.sh

4. Setup user accounts
vi ~/conf/tomcat-users.xml

<role rolename="manager-gui"/>
<user username="vinod" password="pwd" roles="manager-gui"/>

<role rolename="admin-gui"/>
<user username="admin" password="admin" roles="manager-gui, admin-gui"/>

cd ~/bin
./shutdown.sh
./startup.sh

6. Verify tomcat by URL http://localhost:9001/manager/
Tomcat Multiple Installation In CentOS with Example 9001

For second and other instance you have to just do as mention bellow:

tar -zxvf apache-tomcat-8.0.32.tar.gz -C /yournewdirname/

vi ~/conf/tomcat-users.xml

<role rolename="manager-gui"/>
<user username="vinod" password="pwd" roles="manager-gui"/>

<role rolename="admin-gui"/>
<user username="admin" password="admin" roles="manager-gui, admin-gui"/>

Change the port in server.xml file, if port conflict there then change the other value:

<?xml version='1.0' encoding='utf-8'?>
<!--
  Licensed to the Apache Software Foundation (ASF) under one or more
  contributor license agreements.  See the NOTICE file distributed with
  this work for additional information regarding copyright ownership.
  The ASF licenses this file to You under the Apache License, Version 2.0
  (the "License"); you may not use this file except in compliance with
  the License.  You may obtain a copy of the License at

      http://www.apache.org/licenses/LICENSE-2.0

  Unless required by applicable law or agreed to in writing, software
  distributed under the License is distributed on an "AS IS" BASIS,
  WITHOUT WARRANTIES OR CONDITIONS OF ANY KIND, either express or implied.
  See the License for the specific language governing permissions and
  limitations under the License.
-->
<!-- Note:  A "Server" is not itself a "Container", so you may not
     define subcomponents such as "Valves" at this level.
     Documentation at /docs/config/server.html
 -->
<Server port="8051" shutdown="SHUTDOWN">
  <Listener className="org.apache.catalina.startup.VersionLoggerListener" />
  <!-- Security listener. Documentation at /docs/config/listeners.html
  <Listener className="org.apache.catalina.security.SecurityListener" />
  -->
  <!--APR library loader. Documentation at /docs/apr.html -->
  <Listener className="org.apache.catalina.core.AprLifecycleListener" SSLEngine="on" />
  <!-- Prevent memory leaks due to use of particular java/javax APIs-->
  <Listener className="org.apache.catalina.core.JreMemoryLeakPreventionListener" />
  <Listener className="org.apache.catalina.mbeans.GlobalResourcesLifecycleListener" />
  <Listener className="org.apache.catalina.core.ThreadLocalLeakPreventionListener" />

  <!-- Global JNDI resources
       Documentation at /docs/jndi-resources-howto.html
  -->
  <GlobalNamingResources>
    <!-- Editable user database that can also be used by
         UserDatabaseRealm to authenticate users
    -->
    <Resource name="UserDatabase" auth="Container"
              type="org.apache.catalina.UserDatabase"
              description="User database that can be updated and saved"
              factory="org.apache.catalina.users.MemoryUserDatabaseFactory"
              pathname="conf/tomcat-users.xml" />
  </GlobalNamingResources>

  <!-- A "Service" is a collection of one or more "Connectors" that share
       a single "Container" Note:  A "Service" is not itself a "Container",
       so you may not define subcomponents such as "Valves" at this level.
       Documentation at /docs/config/service.html
   -->
  <Service name="Catalina">

    <!--The connectors can use a shared executor, you can define one or more named thread pools-->
    <!--
    <Executor name="tomcatThreadPool" namePrefix="catalina-exec-"
        maxThreads="150" minSpareThreads="4"/>
    -->


    <!-- A "Connector" represents an endpoint by which requests are received
         and responses are returned. Documentation at :
         Java HTTP Connector: /docs/config/http.html (blocking & non-blocking)
         Java AJP  Connector: /docs/config/ajp.html
         APR (HTTP/AJP) Connector: /docs/apr.html
         Define a non-SSL/TLS HTTP/1.1 Connector on port 8091
    -->
    <Connector port="9001" protocol="HTTP/1.1"
               connectionTimeout="20000"
               redirectPort="8491" />
    <!-- A "Connector" using the shared thread pool-->
    <!--
    <Connector executor="tomcatThreadPool"
               port="9001" protocol="HTTP/1.1"
               connectionTimeout="20000"
               redirectPort="8491" />
    -->
    <!-- Define a SSL/TLS HTTP/1.1 Connector on port 8491
         This connector uses the NIO implementation that requires the JSSE
         style configuration. When using the APR/native implementation, the
         OpenSSL style configuration is required as described in the APR/native
         documentation -->
    <!--
    <Connector port="8491" protocol="org.apache.coyote.http11.Http11NioProtocol"
               maxThreads="150" SSLEnabled="true" scheme="https" secure="true"
               clientAuth="false" sslProtocol="TLS" />
    -->

    <!-- Define an AJP 1.3 Connector on port 8009 -->
    <Connector port="2001" protocol="AJP/1.3" redirectPort="8491" />


    <!-- An Engine represents the entry point (within Catalina) that processes
         every request.  The Engine implementation for Tomcat stand alone
         analyzes the HTTP headers included with the request, and passes them
         on to the appropriate Host (virtual host).
         Documentation at /docs/config/engine.html -->

    <!-- You should set jvmRoute to support load-balancing via AJP ie :
    <Engine name="Catalina" defaultHost="localhost" jvmRoute="jvm1">
    -->
    <Engine name="Catalina" defaultHost="localhost">

      <!--For clustering, please take a look at documentation at:
          /docs/cluster-howto.html  (simple how to)
          /docs/config/cluster.html (reference documentation) -->
      <!--
      <Cluster className="org.apache.catalina.ha.tcp.SimpleTcpCluster"/>
      -->

      <!-- Use the LockOutRealm to prevent attempts to guess user passwords
           via a brute-force attack -->
      <Realm className="org.apache.catalina.realm.LockOutRealm">
        <!-- This Realm uses the UserDatabase configured in the global JNDI
             resources under the key "UserDatabase".  Any edits
             that are performed against this UserDatabase are immediately
             available for use by the Realm.  -->
        <Realm className="org.apache.catalina.realm.UserDatabaseRealm"
               resourceName="UserDatabase"/>
      </Realm>

      <Host name="localhost"  appBase="webapps"
            unpackWARs="true" autoDeploy="true">

        <!-- SingleSignOn valve, share authentication between web applications
             Documentation at: /docs/config/valve.html -->
        <!--
        <Valve className="org.apache.catalina.authenticator.SingleSignOn" />
        -->

        <!-- Access log processes all example.
             Documentation at: /docs/config/valve.html
             Note: The pattern used is equivalent to using pattern="common" -->
        <Valve className="org.apache.catalina.valves.AccessLogValve" directory="logs"
               prefix="localhost_access_log" suffix=".txt"
               pattern="%h %l %u %t &quot;%r&quot; %s %b" />

      </Host>
    </Engine>
  </Service>
</Server>

cd ~/bin
./startup.sh

Verify tomcat by URL http://localhost:9002/manager/

Tomcat Multiple Installation In CentOS with Example 9002


Please must see video for more details.

Like and share it!!!

Installing Jenkins and Java in CentOS6.5 and Creating the Freestyle Project Job for Shell command execution

In this tutorial we will learn, how to install openJDK and Jenkins in CentOS6.5 and how to configured jobs in Jenkins.

We need:
1. CentOS6.5 Installed in your system
2. Have root level access
3. Internet access in your system for downloading the required files


Installing the java-1.7.0-openjdk

For installing the java you have to type the bellow command:

[root@dev]# yum install java-1.7.0-openjdk
...

[root@dev]# java -version
[root@dev]# java -version
java version "1.7.0_95"
OpenJDK Runtime Environment (rhel-2.6.4.0.el6_7-x86_64 u95-b00)
OpenJDK 64-Bit Server VM (build 24.95-b01, mixed mode)

Installation of a stable version of Jenkins

wget -O /etc/yum.repos.d/jenkins.repo http://pkg.jenkins-ci.org/redhat-stable/jenkins.repo
rpm --import https://jenkins-ci.org/redhat/jenkins-ci.org.key
yum install jenkins

Start/Stop
service jenkins start/stop/restart
chkconfig jenkins on

Start the Jenkins
service jenkins start

Verify Jenkins is running or not?

[root@dev]# ps -ef | grep jenkins
root      3912  1939  0 20:17 pts/0    00:00:00 grep jenkins
jenkins   8331     1  5 19:41 ?        00:01:58 /etc/alternatives/java -Dcom.sun.akuma.Daemon=daemonized -Djava.awt.headless=true -DJENKINS_HOME=/var/
lib/jenkins -jar /usr/lib/jenkins/jenkins.war --logfile=/var/log/jenkins/jenkins.log --webroot=/var/cache/jenkins/war --daemon --httpPort=8080 --ajp13
Port=8009 --debug=5 --handlerCountMax=100 --handlerCountMaxIdle=20

Note: I'm running CentOS with vagrant and virtual box so I have to do the tunneling for access the Host and port of Jenkins by putty. 

Open the any browser and type the URL of Jenkins

http://localhost:8080/

Jenkins in CentOS with OpenJDK


Create the Jobs:

Click on the New Item
Type the Item Name First-job-in-jenkins
Select the Freestyle project
In configuration page come all the way down

Select Execute Shell from Add build step and type

ps -fe | grep jenkins

Jenkins-in-centos-java-home-page-jobs-execute shell


Email notification from Add post build action
Type the email Recipients 

Click on the Save

Now this configuration will save 

[root@dev]# vi /var/lib/jenkins/jobs/First-job-in-jenkins/config.xml

<?xml version='1.0' encoding='UTF-8'?>
<project>
  <actions/>
  <description></description>
  <keepDependencies>false</keepDependencies>
  <properties>
    <jenkins.model.BuildDiscarderProperty>
      <strategy class="hudson.tasks.LogRotator">
        <daysToKeep>2</daysToKeep>
        <numToKeep>2</numToKeep>
        <artifactDaysToKeep>-1</artifactDaysToKeep>
        <artifactNumToKeep>-1</artifactNumToKeep>
      </strategy>
    </jenkins.model.BuildDiscarderProperty>
  </properties>
  <scm class="hudson.scm.NullSCM"/>
  <canRoam>true</canRoam>
  <disabled>false</disabled>
  <blockBuildWhenDownstreamBuilding>false</blockBuildWhenDownstreamBuilding>
  <blockBuildWhenUpstreamBuilding>false</blockBuildWhenUpstreamBuilding>
  <triggers>
    <hudson.triggers.TimerTrigger>
      <spec></spec>
    </hudson.triggers.TimerTrigger>
  </triggers>
  <concurrentBuild>true</concurrentBuild>
  <builders>
    <hudson.tasks.Shell>
      <command>ps -ef | grep jenkins</command>
    </hudson.tasks.Shell>
  </builders>
  <publishers>
    <hudson.tasks.Mailer plugin="mailer@1.11">
      <recipients>tutorialbyexample@gmail.com</recipients>
      <dontNotifyEveryUnstableBuild>false</dontNotifyEveryUnstableBuild>
      <sendToIndividuals>true</sendToIndividuals>
    </hudson.tasks.Mailer>
  </publishers>
  <buildWrappers/>
</project>

About Jenkins Installation in CentOS and Job creation!


This is all about how to install Jenkins and Java in CentOS6.5 with job creation in Jenkins.

Ref:
https://wiki.jenkins-ci.org
http://openjdk.java.net/
https://www.centos.org/
https://www.vagrantup.com/
https://www.virtualbox.org/
http://www.putty.org/

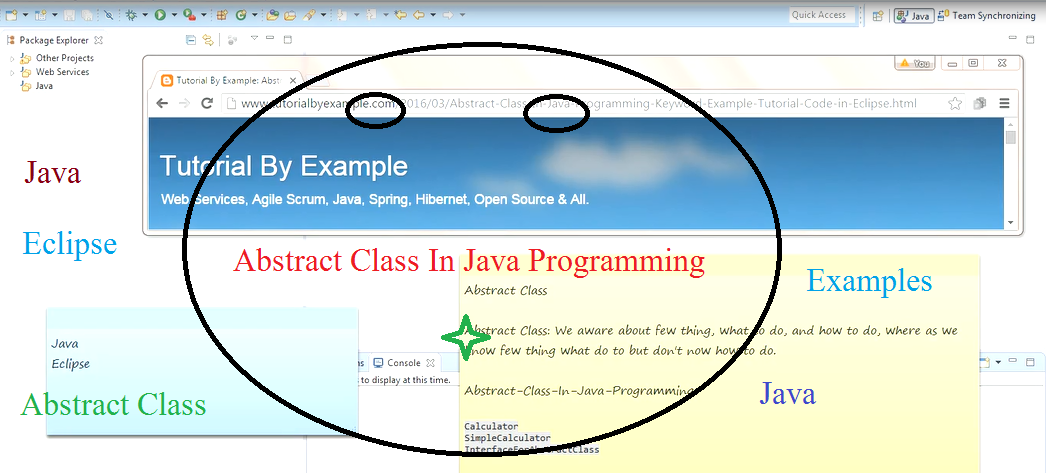
Abstract class in java programming


Create the Abstract-Class-Demo java project in eclipse.
Abstract-Class-Demo


package com.atozexamples;

public abstract class Calculator implements Displayable {

       abstract void print();

       public int add(int a, int b) {
              return a + b;
       }
 }


Must see video:


Abstract Class In Java Programming


Abstract Class: We aware about few thing, what to do, and how to do, where as we know few thing what do to but don't now how to do.

Must watch video:


e.g:

Abstract class..

public abstract class NameOfAbstraceClass {
}

Abstract class with one abstract method:

packagecom.tutorialbyexample;

public abstract class Calculator {

       public Calculator() {
              // TODO Auto-generated constructor stub
       }

       abstract void print();
}

Abstract class with one abstract method and one non abstract method:

packagecom.tutorialbyexample;

public abstract class Calculator {

       public Calculator() {
              // TODO Auto-generated constructor stub
       }

       abstract void print();

       public int Addition(int parameter1, int parameter2) {
              return parameter1 + parameter2;

       }

}


Abstract class implemented in SimpleCalculator class by extends keywords:

packagecom.tutorialbyexample;

public class SimpleCalculator extends Calculator {

       public SimpleCalculator() {
              // TODO Auto-generated constructor stub
       }

       public static void main(String[] args) {
              // TODO Auto-generated method stub

       }

       @Override
       void print() {
              System.out.println("Print implementation from abstract class");

       }
}

Object creation of SimpleCalculator class and called both abstract and non abstract methods from abstract class:

packagecom.tutorialbyexample;

public class SimpleCalculator extends Calculator {

       public SimpleCalculator() {
              // TODO Auto-generated constructor stub
       }

       @Override
       void print() {
              System.out.println("Print implementation from abstract class");
       }

       public static void main(String arg[]) {

              SimpleCalculator obj = new SimpleCalculator();
              obj.Addition(1, 2);
              obj.print();

       }
}

Interface for Abstract class:

packagecom.tutorialbyexample;

public interfaceInterfaceForAbstractClass {

       void display();

}

Interface implemented in abstract class Calculator abstract class and display method not required to implement in it:

package com.tutorialbyexample;

public abstract class Calculator implementsInterfaceForAbstractClass {

       public Calculator() {
              // TODO Auto-generated constructor stub
       }

       abstract void print();

       public int Addition(int parameter1, int parameter2) {
              return parameter1 + parameter2;

       }
}

Error:
The type SimpleCalculator must implement the inherited abstract method InterfaceForAbstractClass.display()

packagecom.tutorialbyexample;

public class SimpleCalculator extends Calculator {

       public SimpleCalculator() {
              // TODO Auto-generated constructor stub
       }

       @Override
       void print() {
              System.out.println("Print implementation from abstract class");
       }

       public static void main(String arg[]) {

              SimpleCalculator obj = new SimpleCalculator();
              obj.Addition(1, 2);
              obj.print();

       }

       @Override
       public void display() {
              // TODO Auto-generated method stub
             
       }
}


Abstract-Class-In-Java-Programming-Keyword-Example-Tutorial-Code-in-Eclipse


Errors & Solutions:

* Issue with final abstract, e.g.
public final abstract class Calculator {
}

* Class cannot be both final and abstract or The class Calculator can be either abstract or final, not both
Solution: We can't put final and abstract together. While putting final can't subclass.
public abstract class Calculator {
}

* Issue with static abstract, e.g.
public static abstract class Calculator {
}

Illegal modifier for the class Calculator; only public, abstract & final are permitted

Solution:

public abstract class Calculator {
}

* Issue we can't instantiate abstract class
* Cannot instantiate the type Calculator
Solution: Don't try to create object of abstract class.
Calculator obj = new Calculator();


Issue, if you not implement the abstract method in abstract class while implementing
The type SimpleCalculator must implement the inherited abstract method Calculator.print()

Solution: Implement abstract methods in implementation class what we have in abstract class.

Please like and share it!!! 
Ref:

Oracle Click me